http://www.insidemylaptop.com/replace-damaged-lcd-screen-dell-vostro-1500-laptop/So, I dropped my laptop and it landed screen down and spread open and my LCD screen cracked. I forgot to take a picture of the broken screen. Here's how I replaced the screen for my Dell 2510. I followed the instructions for a Dell Vostro 1500 which was only a little different.
Tools that I used: one eyeglass screwdriver and a pair of tweezers (I dropped one of the screws in a hard to reach place).
My broken screen

I pulled off the little sticky black circles (6 total) that were covering the screws in the plastic frame or bezel.

Here's the screw behind the sticky black circle.
The top circles are actually rubber pads.
The sticky tape holding the rubber pads in place kept getting stuck to the screw.
I used the flat head of the screwdriver to pry off the sticky tape to reuse.
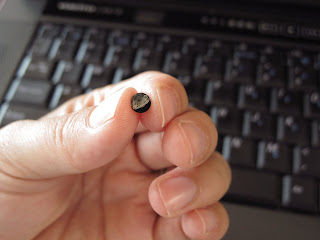
Picture of the sticky tape circle on my finger. I tried to keep it as circular as possible.
I stuck the tape onto the rubber pad that I picked off.
After all six screws were removed, it was easy to pull off the bezel.
Here's a photo of the bezel completely pulled off.
There were three more screws take off near the bottom of the screen at the corners and near the middle. The two screws in the corner attach the metal frame to the lid of the lap top and one in the middle that held the inverter connector in place.
Inverter connector screw.
Once the metal frame could be separated from the laptop lid, there were six more screws that needed to be removed. These six screws held the LCD screen to the metal frame. I removed the screws before I unplugged the inverter and the LCD cable connecter, but I should have unplugged the two cables first before unscrewing the LCD screen from the frame.I ended up putting the screws back in before I unplugged the cables.
The following pictures are of the LCD cable connector.
A close-up of the LCD cable connector.
The connector was held in place by some tape. I peeled the tape back slowly
I peeled it off only the LCD screen parts and left it stuck to the cable side so that I could reuse it on the new screen.
The LCD cable connector pulled straight out. I didn't have to pinch any flaps or tilt it.
Underside of the LCD cable connector.
The cable connector was also stuck to the LCD screen near the bottom of the screen.
I slowly peeled the sticky part of the cable off of the screen.
The inverter connector was at the bottom of the screen near the middle.
I pulled the pink and white wires out of the inverter.
I pulled out the old screen and screwed the new screen into the metal frame. Then I screwed the frame and inverter back in place.
I removed the plastic from the new screen.
I plugged the LCD cable connector to the new screen.
I stuck the tape to the new screen.
I plugged the inverter cable back in. The new screen had a pink wire and a black wire instead of a pink and white.
I snapped the bezel back in place.
I put back all the screws in the frame and the black covers.
My new working LCD screen :)


These instructions worked very well for my Vostro 3500. Thank you very much :)
ReplyDeleteNice job, Carolyn! Judging from how you replaced your laptop LCD screen, I must say, you were very cautious about it. Even by removing the sticky tape and putting it back to the rubber pad was meticulously done. Anyhow, you can now have a part-time job, and that is to repair a laptop LCD screen. Hehe. But seriously, you can actually do that. ;)
ReplyDelete